Pressure measurement is critical in various industries, from HVAC systems to clean rooms and laboratories. One of the most commonly used instruments for measuring differential pressure is the Magnehelic pressure gauge. This article will provide a comprehensive guide on how to properly calibrate your Magnehelic pressure gauge, ensuring accuracy and reliability in your measurements.
Understanding the Magnehelic Pressure Gauge

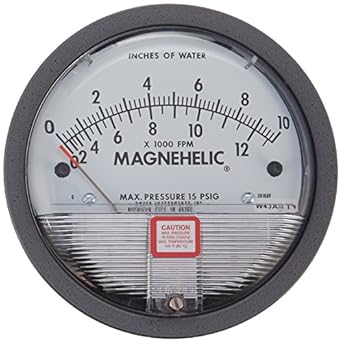
The Magnehelic pressure gauge is a highly sensitive instrument that measures differential pressure in various applications. Its operation is based on the principles of hydraulic and pneumatic pressure. Given its importance, ensuring that this gauge is accurately calibrated is vital for maintaining the integrity of the systems it monitors.
Key Features of Magnehelic Gauges
- Easy Reading: The gauge features a simple dial display that allows for quick readings.
- Wide Range: Magnehelic gauges can measure pressure ranges from 0 to 100 inches of water column.
- Durability: These gauges are designed to withstand harsh environments, making them suitable for various industrial applications.
- Low Maintenance: Unlike other pressure measurement devices, Magnehelic gauges require minimal maintenance.
Why Calibration is Essential
Calibration is the process of adjusting the accuracy of a measuring instrument to ensure its readings are as close to the true values as possible. For pressure gauges, calibration is crucial for several reasons:
- Accuracy: Inaccurate readings can lead to poor decision-making and system inefficiencies.
- Compliance: Many industries have regulatory requirements that mandate regular calibration of measurement instruments.
- Cost Saving: Regular calibration can help prevent costly equipment failures or operational downtime.
- Safety: Accurate pressure readings are essential for maintaining safe operating conditions in many applications.
When to Calibrate Your Magnehelic Gauge
Calibration of the Magnehelic pressure gauge should be performed under certain conditions:
- After installation: Calibration should be conducted once the gauge is installed to ensure accuracy in its new environment.
- Periodic checks: Regular calibration intervals should be established based on industry standards, typically every six months to one year.
- Following maintenance: If the gauge has undergone repairs or significant handling, recalibration is necessary.
- Before critical measurements: If the pressure readings are crucial for safety or compliance, calibration should be verified beforehand.
Tools Needed for Calibration
To calibrate your Magnehelic gauge effectively, you will need specific tools. Here’s a list of essential items:
- Calibrated Pressure Source: This can be a pressure calibrator or a reference gauge that has been calibrated against a known standard.
- Connecting Tubes: Ensure you have the right tubing to connect the pressure source to the gauge.
- Adjusting Tools: Depending on the gauge model, you may need screwdrivers or other tools to make adjustments.
- Calibration Certificate: This is optional but highly recommended for documentation and compliance purposes.
Step-by-Step Calibration Process
The calibration process for a Magnehelic pressure gauge consists of several systematic steps:
1. Prepare the Equipment
Gather all the necessary tools and ensure that the environment is stable (temperature, humidity, etc.) during calibration. Make sure the Magnehelic gauge is clean and free of any obstructions.
2. Connect the Pressure Source
Using the connecting tubes, connect the calibrated pressure source to the Magnehelic gauge. Make sure the connections are airtight to avoid leaks.
3. Apply Known Pressures
Gradually apply known pressure levels to the gauge, starting from zero and moving to the maximum rated pressure. For example, if you are calibrating a gauge that measures up to 10 inches of water column, step through the following pressures:
- 0 in. WC
- 2 in. WC
- 5 in. WC
- 7 in. WC
- 10 in. WC
4. Record the Readings

At each pressure level, note the reading on the Magnehelic gauge. This data is crucial for comparing the gauge’s performance against the known values.
5. Make Adjustments
If there are discrepancies between the gauge reading and the known pressure, adjustments may be necessary. Depending on the model, this may involve turning a calibration screw or adjusting the mechanical elements inside the gauge.
6. Repeat the Process

After making adjustments, repeat the process to verify that the gauge now reads accurately at each pressure level. This step might need to be done several times to achieve the desired accuracy.
7. Final Documentation

Once calibration is complete and the gauge is accurately reading, document the process. Include the pressures applied, the corresponding readings, and any adjustments made. This documentation is vital for compliance and future reference.
Case Study: Importance of Calibration in HVAC Systems
In HVAC systems, accurate pressure readings are essential for maintaining air quality and energy efficiency. A case study involving a commercial building showed that a poorly calibrated Magnehelic gauge led to incorrect airflow measurements. This resulted in:
- Increased energy consumption by 20% due to inefficient system performance.
- Higher operational costs, resulting in an additional $5,000 in energy bills over a year.
- Compromised air quality affecting the health of occupants.
This example highlights the importance of regular calibration and maintenance of pressure gauges in ensuring optimal performance and safety in HVAC systems.
Calibrating your Magnehelic pressure gauge is not merely a procedural task; it’s a crucial practice that ensures accuracy, compliance, and safety in various applications. By understanding the importance of calibration, the proper tools required, and the step-by-step process, you can maintain the integrity of your pressure measurement systems.
Remember to adhere to recommended calibration schedules and document each process for future reference. Regular calibration not only saves costs but also enhances operational efficiency and safety across your organization.